Storage and Transportation
I realized while talking to another church that my previous blog post about off-site check-in didn’t include as much detail as I thought it did about the actual I.T. side of the process, so I thought I would elaborate more on that seeing as we are in the middle of setting up another campus.
We started with a Stanley 37″ Mobile Job Box from Home Depot. This is a heavy duty box on wheels with a pull out handle. The handle is a bit short for your average person as it tends to bang into my ankles if I walk normally with it so I have to hobble a bit. It does have a lock though we don’t use it as the box itself is always secured in our building when not in use. We have had one of these in use for a year now at our Apple Valley campus and we have not run into any issues with it yet.
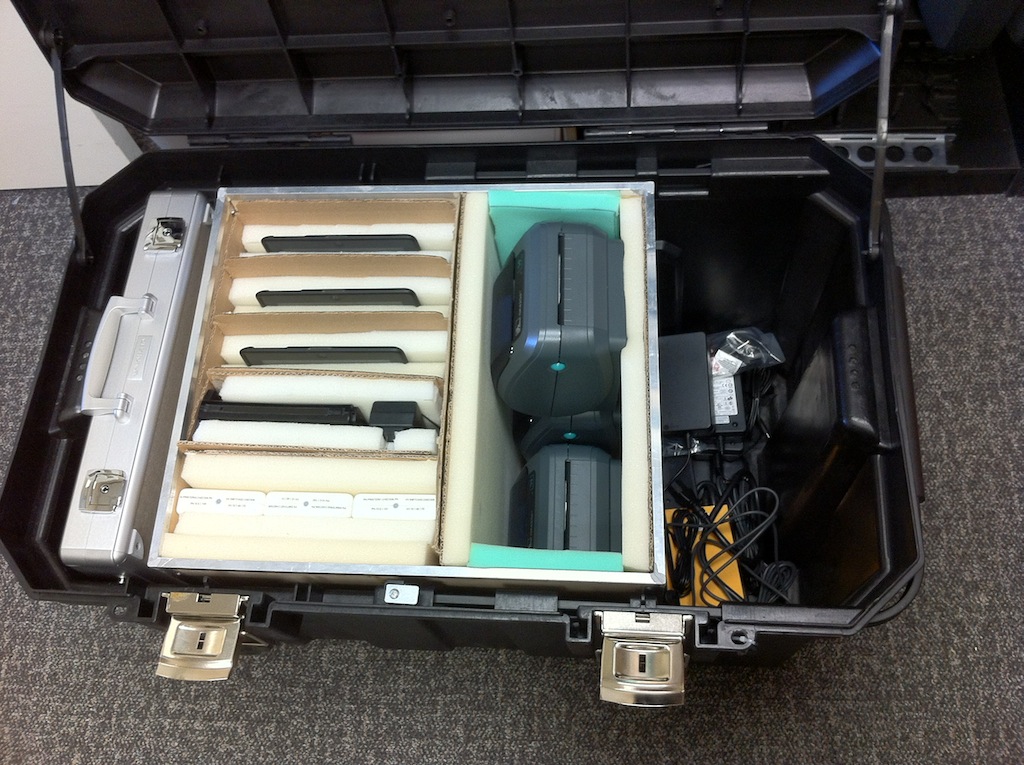
We then had our facilities manager build us a wooden box to go inside. This inner box is what we put all the really expensive equipment in and is padded with foam. We built the box to be 18.5″x20″x19″ (WxLxH). Basically we had it built so that it just barely fit in the box with a length of 20 inches. This leaves us a usable “gap” of about 10 inches for cables and such outside this inner box. Yes this is a 37″ job box, but there is about a good 8″ of that which is completely unusable for our purposes due to the shape.
Inside this inner box we designed out the spacing we needed to get all our equipment safely stored with foam. All the empty space (and there is a lot at the bottom) we filled with small cardboard shipping boxes. We purchased various sizes, I believe they were 3x3x1, 3x3x2, 3x3x3x3, 3x6x3 and 3x9x3. In reality I don’t think we used the 3x6x3 and 3x9x3 boxes. This cost us about $100 in cardboard boxes and we have enough to make about 8 of these campus boxes. The cost to do the same in pure foam would have been closer to $400 – per box.
We used random large shipping boxes to create the sectional areas and gorilla glue to glue everything in place. The foam we got from Walmart, it is 1-inch thick foam and is sold in a sheet. We had to buy 2 sheets (as evident by the 2 different colors) and I believe each sheet was about $40. I don’t have a link as we bought it in-store and I can’t find a link on their website, but it is sold in their crafts department. A little experimentation led us to the design you see.
VPN (Network Connection)
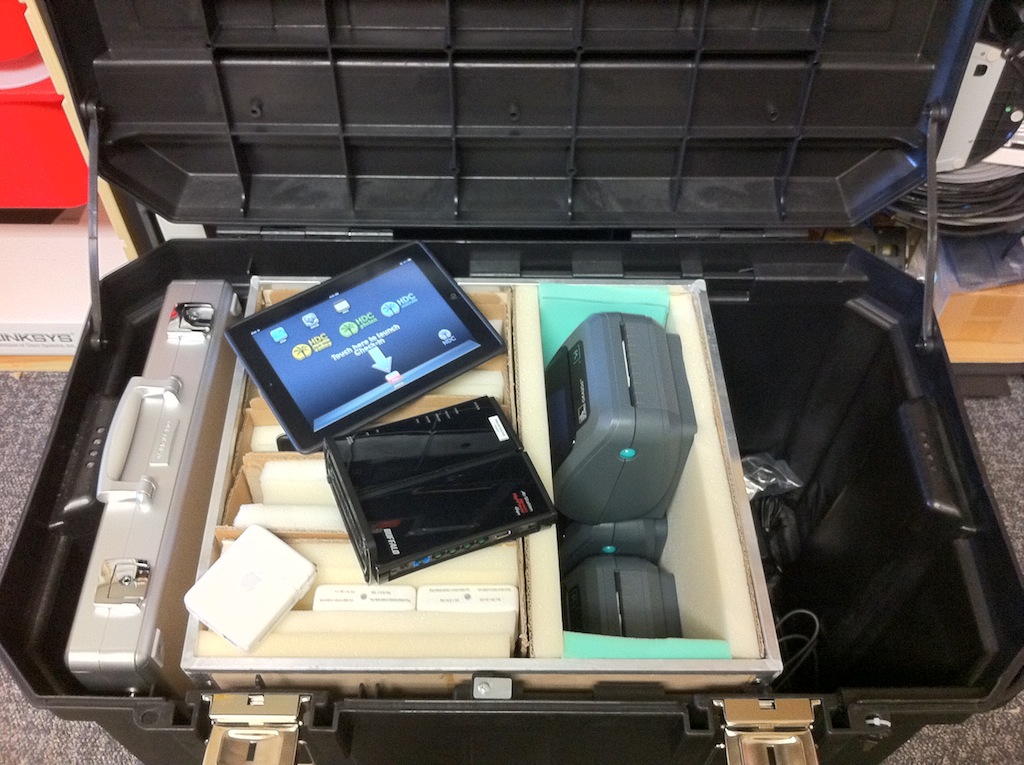
Linking up the remote site to our main campus is done via a VPN connection, specifically using OpenVPN. This is a an open-source VPN implementation that works over any TCP or UDP port. Therefore usually you can punch through firewalls with it. In our case we are plugged into the school’s wired network and the standard OpenVPN port (1194 UDP) works fine. The device we use for this is a Buffalo Technologies WZR-HP-G300NH (Update 10-12-2012: It looks like Buffalo has replaced/renamed the product with this one: WZR-300HP). This is an open-source (dd-wrt) based router that supports OpenVPN internally. I believe it also supports PPTP VPN connections.
The router establishes a site-to-site VPN connection into our main campus and then sets up the routing tables needed for the local devices to connect remotely into our campus. It also serves up a WiFi network that allows the iPads and Apple Airport Express units to connect to. Because the connection is site-to-site, this means that the local devices have no clue that they are not “plugged” directly into our network. The only thing they can’t do is use “browsing” services such as Bonjour to see other devices – and that is fine with us.
The dd-wrt software runs on top of Linux so we were able to write some custom shell scripts that run automatically set the lights on the front of the unit to indicate the status of the connection. One light turns on when a valid Internet connection is detected and a second light turns on when a valid VPN connection is established. This way if somebody from the campus calls with problems we can quickly have them let us know which lights are on and that helps us know where to start looking for problems. Because these things run dd-wrt they can be a little complex to setup, and site-to-site VPN connections are a little more complex than your standard laptop VPN connection so you will need some knowledge of networking and routing tables to get your site-to-site VPN setup (wether you use this device or another device).
Printing
Printing is done by a combination of Apple Airport Express units and Zebra GK420d USB printers. The Apple Airport Express (APE) is setup to work as a wireless client, meaning it connects to the WiFi network created by the router and provides that network connection to the printer. Zebra does have a wireless version of the printer, but we found that it was unstable on a secured network and after a month of trouble-shooting with Zebra decided they were not serious about fixing the problem. After a month working with them they still claimed they had no way to test internally the problem we were running into. Meaning they had no GX420d model and no secured wireless network to try connecting it to.
Therefore to resolve the problem we purchase APE units to act as the WiFi bridge. We have used this setup in both Ethernet mode (meaning we buy the Ethernet version of the GK420d printers and have the APE bridge the WiFi to the Ethernet port) as well as, more recently, used the APE units as the print servers themselves and plugged the printers in via USB. This is a simpler configuration as we then do not have to configure anything on the printer itself. The APE remembers which printer is plugged into it so we have to make sure each printer is always plugged into the same APE unit each week, but that is easily solved.
As I said, the printers are the GK420d model which is available as a USB only as well as a USB+Ethernet version. We have thus far always purchased the USB+Ethernet versions but in our latest campus we have never even used the Ethernet port. However, doing so lets us easily use these on the main campus (which do use Ethernet) if we ever have to. Don’t let the picture fool you, these printers are not color. They are black and white direct thermal. This means there is no ink ribbon or anything like that to change on the printers. The only thing that ever needs to be changed is the paper roles.
The printer will accept labels up to 4″ wide, but we use 2.25″ x 2.00″ labels for our check-in system. These labels come with 1370 labels per roll and since we print 3 labels per child that means we can print labels for 450 kids without having to change out the roll.
Touch Screen
For our touch screen interface we use Apple iPads (we just use the WiFi model, not the 3G model). Our first off-site campus uses the original iPad and our second campus that we just launched uses the the 2nd generation iPad. We also purchased them as the 16GB as they don’t need any storage. All they do is pull up a web page.
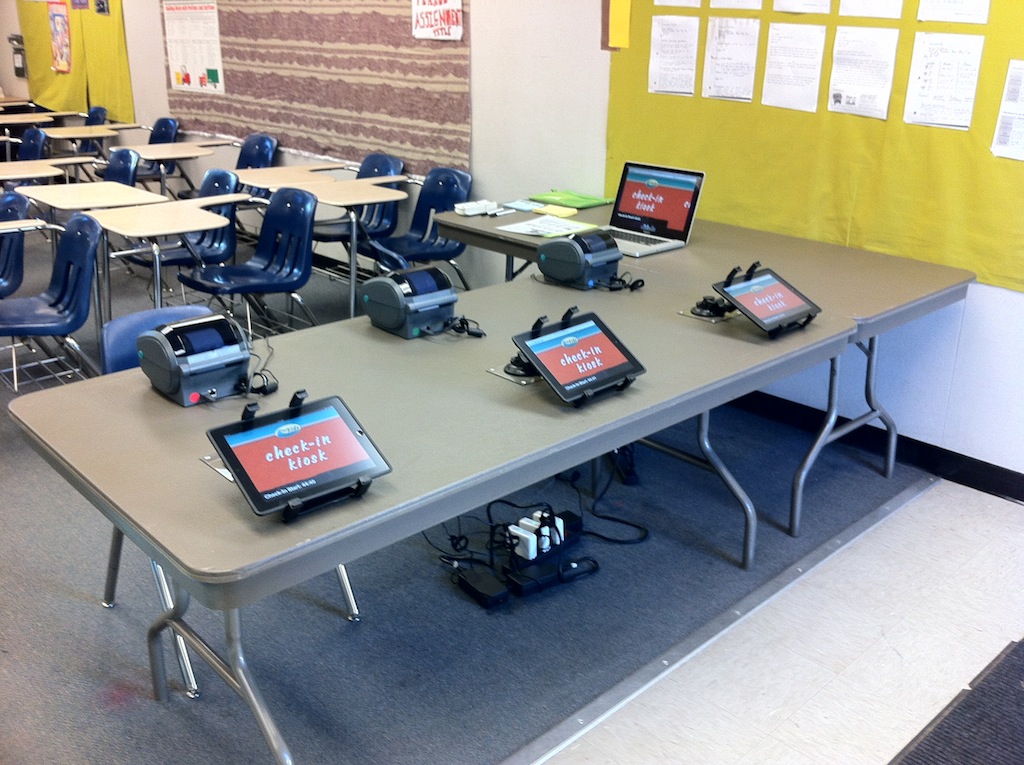
We configure them to automatically join the WiFi network and to never go to sleep. We don’t want them randomly going to sleep and then have people not know how to wake them up or just think that check-in is not happening. There isn’t much to say about these. We put a custom background and lock-screen image on each iPad to make them feel more like an HDC device. We don’t have a specific case to recommend, pretty much anything works. As far as “mounting” them we use car windshield suction cup-style mounts. We have a dedicated table that we glued 3 pieces of plexiglass to for the suction cups to adhere to. The iPads then just slip into the mount holder. We purchased these units, they are a little flimsy and we have had 2 break so far but they get the job done. But any old car windshield mount should work fine.
Data Entry (Laptop)
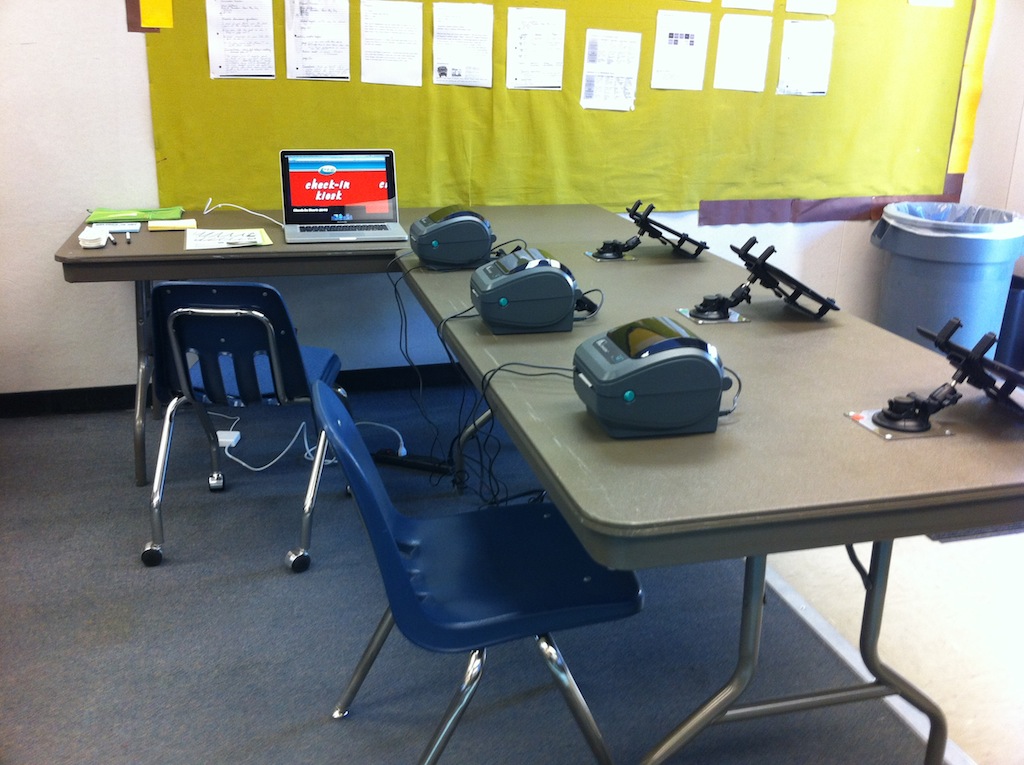
Each off-campus site has 2 laptops. These are 15″ Mac Book Pros. One laptop is used for playing back the message for that weekend (and all other presentation aspects such as the words on screen during worship, etc.). The second laptop (configured identically) is used for data-entry of new families or fixing wrong grades etc. on existing families. If for whatever reason the primary laptop fails or has an issue in the main service they will take the data entry laptop. This gives us a backup that doesn’t just sit around 99% of the time but still gives us a decent laptop for use with check-in.
Finished Product
Some miscellaneous things that the box also includes is a set of pre-printed labels that can be used in case of full system failure. We have told them that these emergency labels are not meant to be used as a one off thing because one single person had an issue. They are only to be used in a “break the glass” scenario meaning all 3 kiosks are not working and they cannot get ahold of I.T. on the phone to work on the problem. The reason for this is that we don’t want them using one or two labels each weekend and then when the system does fully fail and they need to use them, they no longer have enough. The labels include pre-generated security numbers and blanks for the names to be written in.
Experience has also told us that the boxes need to include chargers for the iPads. Twice now the iPads arrived at the off-site campus un-charged. We run the iPads on battery during check-in (fewer cables to worry about plugging in) and then we charge them during the week. One week we somehow just forgot to charge them and another week they were charged but somehow when we put them away we managed to wake them up and they drained the battery before check-in started.
Each “kiosk” is color coded with little circle stickers. So the iPad, Airport Express, Printer and specific table location all get the same color sticker. This helps our volunteers be able to very quickly setup the system. Once they are used to what goes where it takes them about 10 minutes to get everything setup and connected. Teardown is similarly fast, though it does take a little longer as they do a good job of trying to keep everything neat and wrapped nicely. Every single cable has an attached velcro strip so they don’t end up with a big mess of cables when they are done.
When all is said and done, we have a rolling box with everything loaded in it.
The final setup for our Phelan (most recent) campus looks like this: