The Project Management system is designed to give you an easy way to quickly enter and track simple task-based projects. But it also provides the power to expand into more comprehensive project management with sub-projects, blocked tasks and a powerful comment system.
Each project is requested by a single person but can be assigned to multiple people. A project can have tasks that each can be assigned to a single person. Projects can also have sub-projects associated with them if a task to be completed is complex enough to warrant sub-dividing it further. Finally, each type of project can have custom attributes associated with it. This gives you the ability to customize your projects and provide the information you need in order to efficiently complete the project.
E-mail notifications are also built in to keep you up to date when: a project is assigned to you; a task is assigned to you; a new comment on a project you are involved with; a project is marked as completed. This e-mails allow you to easily keep two-way communication open between the requester and those working to accomplish the request.
Project types allow you to define custom attributes, e-mail templates and other settings for the project. A project is also assigned to a category. These categories allow you to organize and group similar projects together, even if they are of different project types.
Quick Start
While you will want to look over the configuration section to understand how to get the most out of Projects, out of the box this plugin is ready to go. A category, project type and project entry button have been configured for you so you can start entering test projects right now.
To get started you will want to navigate to the Tools > Project Entry page. This is where most of your staff will be entering new projects from. Click on the General Project button and you can enter a name for the project as well as some details. Details and Comments are written in something called Markdown. But don't worry about that now. Just type text like you normally would and it generally will figure out what you want. You can always click the Preview button to see what it's going to look like. If you want to add an attachment you can use the upload button, or simply drag the file into the editor and it will upload it for you.
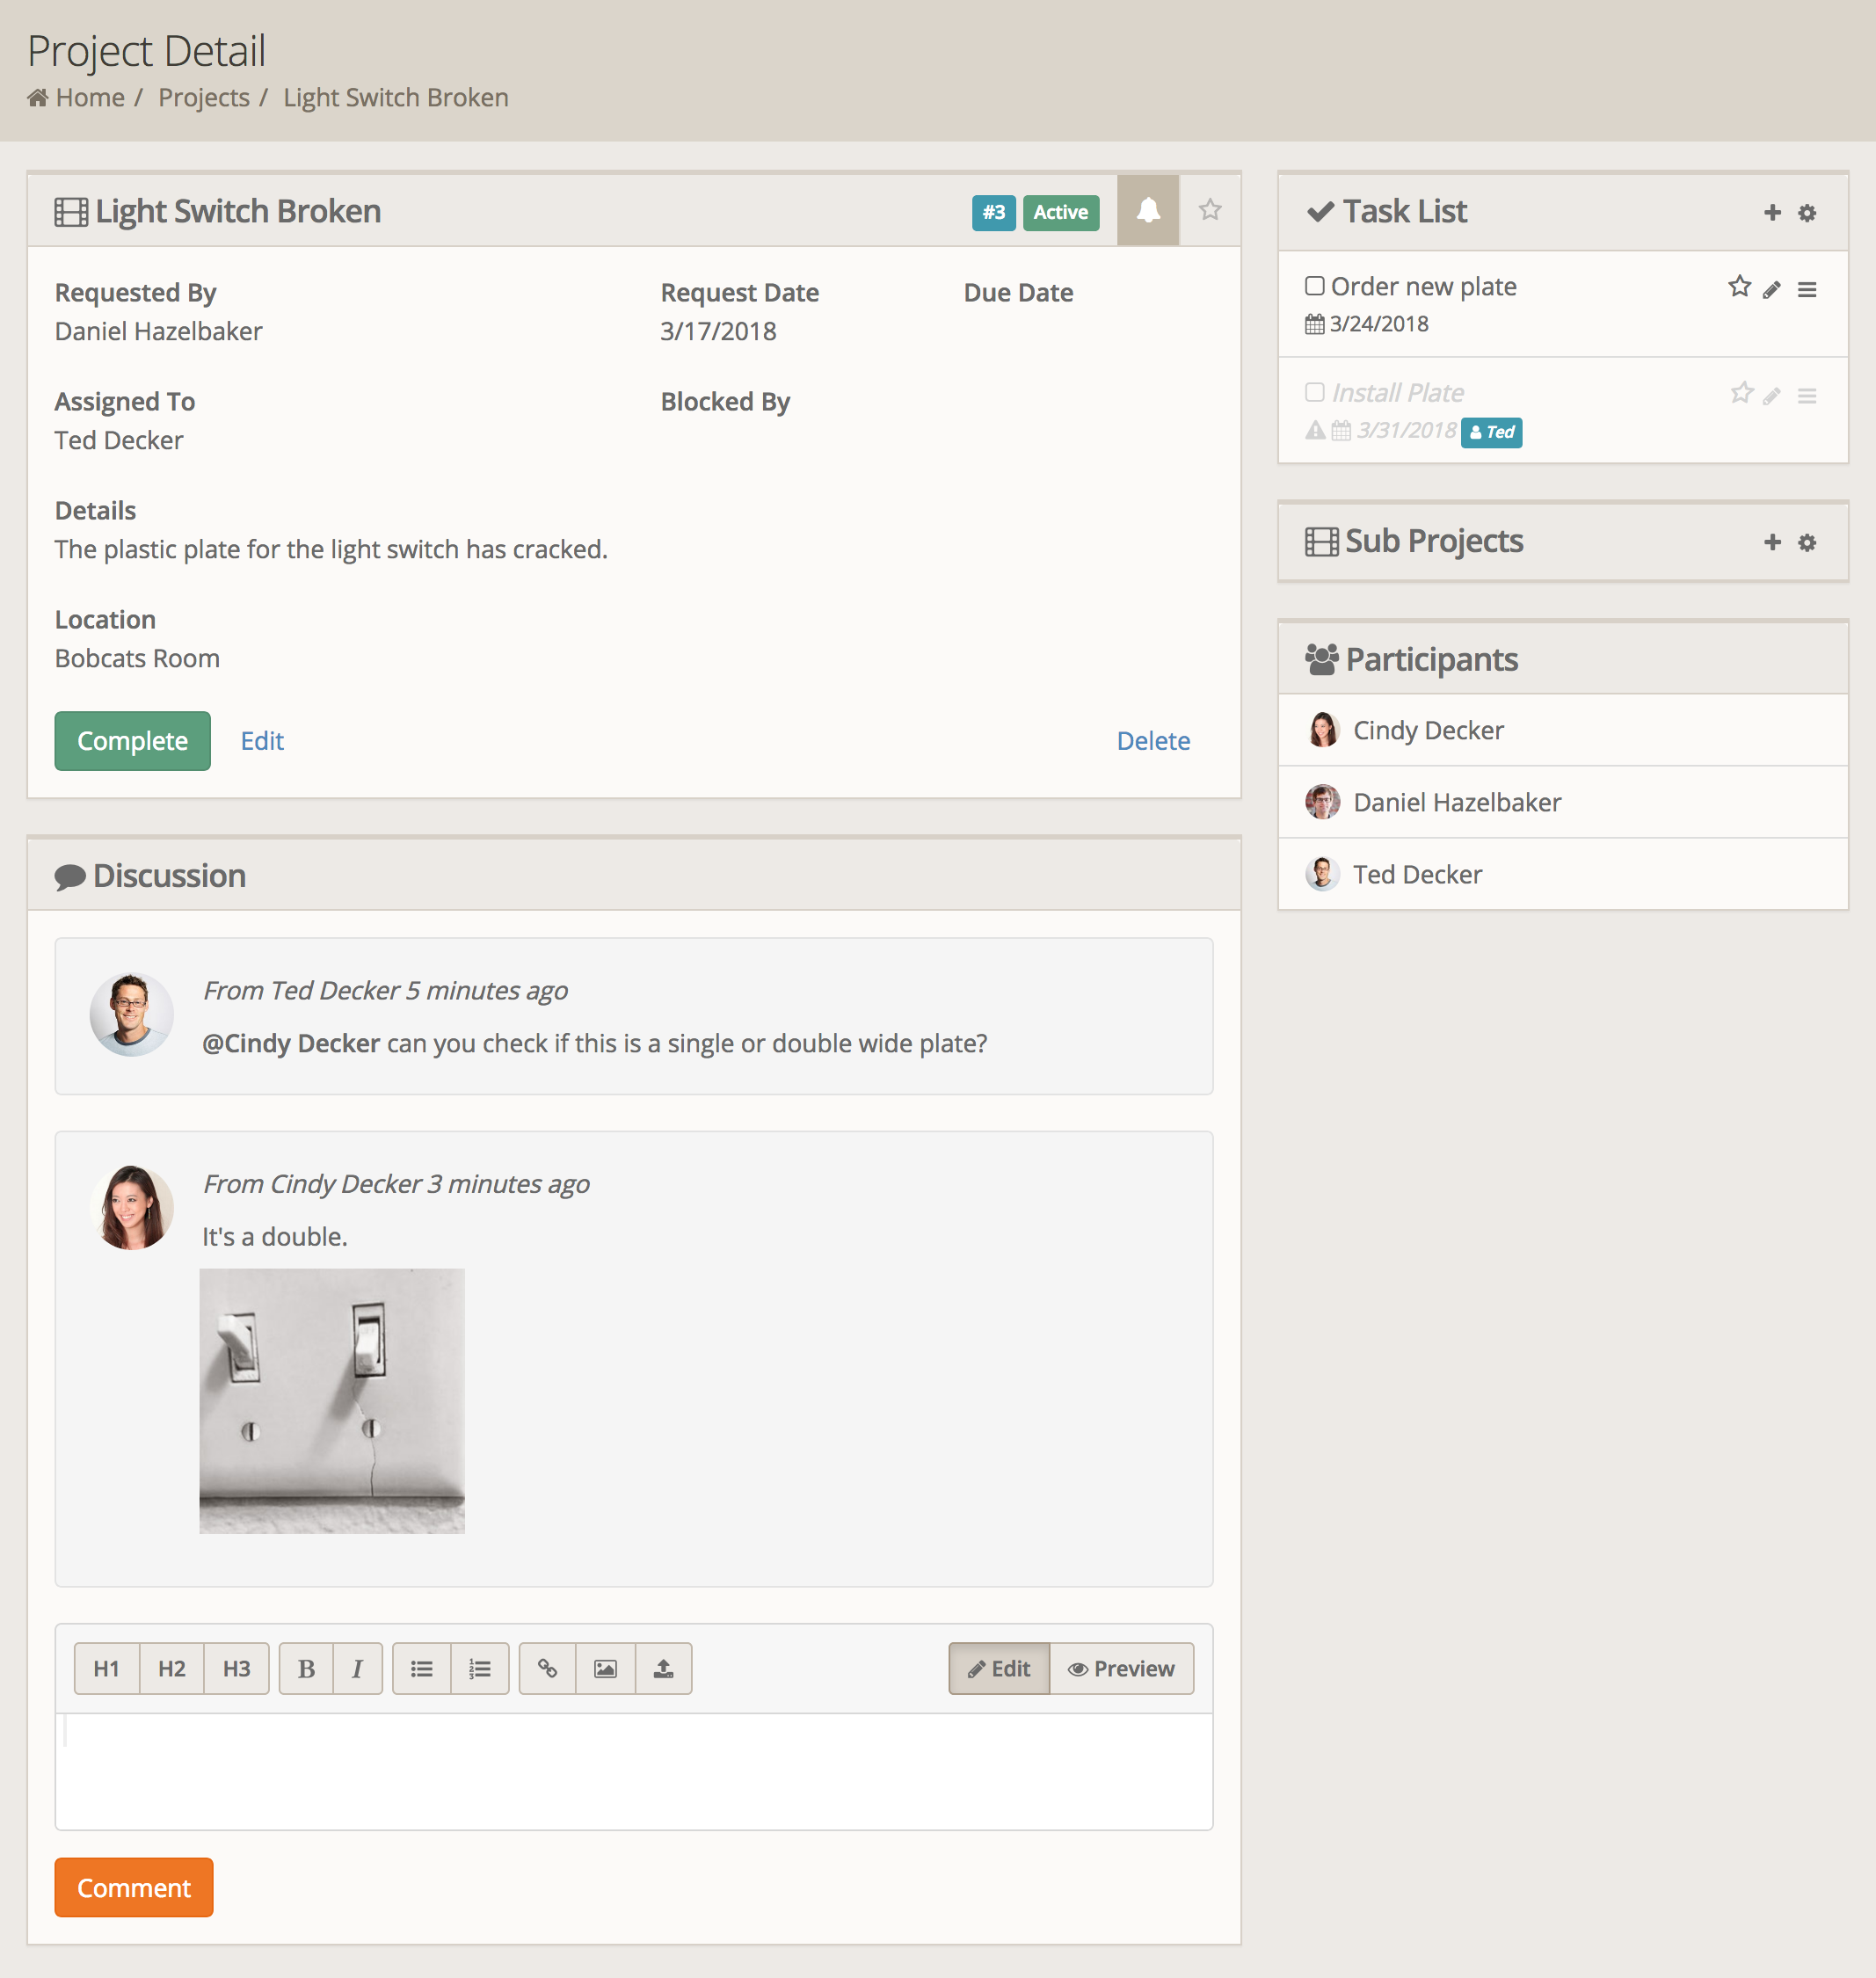
Now that we have some details typed in, click Save and you will be taken to the Project Details screen. On this screen you can see the full details of the project. On the right you will be able to see (and add) individual tasks as well as sub projects. The last box on the right shows you everybody that has participated in the project (that is, the requestor, those assigned to it and anybody that has left a comment. Try adding a few tasks and assign them to various people.
Comments work with the same editor as the details. Something we didn't mention above is, well, mentions. You can mention somebody by preceding their name with the @ symbol. This will send them an e-mail if they are not already part of the discussion. Try adding a comment and mention somebody so you can see the e-mail they recieve.
Before we go marking the project as completed, go to the Tools > Projects menu and you can see all the project types. Click the "Basic Project" button and you should then see a grid, with the project you just created. You can do various filters here, such as limiting the list only to projects assigned to a specific person. Clicking on a project will take you back to the details screen. And on the details screen you can click the Complete button to mark the project as completed.